So a month or so ago I created a small competition where I bought a joby gorillapod mobile rig to do a raffle..
We are coming into the last three days of the competition if this is something that you would like to be in with a chance of winning click the link below to purchase a ticket..
Competition is for United Kingdom residents only.. please only buy tickets if you reside in the United Kingdom.
The last few weeks I’ve been limited to the distance I can go due to health, so creating landscape photography content has been a little challenging and sparse.
So i challenged myself to take something a little different, with a cheap lens that’s not made for the job in hand..
Don’t get me wrong, I have some beautiful locations to photograph on my doorstep but locally there’s a vast number of photographers taking photographs and sharing all very similar images.
Now this isn’t going to be macro at its finest. But the intention was to show, you don’t need the best macro lens or best camera body … to create some macro inspired content. And Head out into the wild and capture some wildlife, well, the small creatures that are out this time of year.
Now, this would have been made simple with a macro lens but sadly last year I broke my lens and due to other factors health wise and money wise I’ve not been able to replace it. So this is the perfect chance to do this challenge.
Also I set myself a few obstacles. Had to be in walking distance of my home, Lens and camera choice had to be light and able to fit in my hoodie pouch.. so I opted to take my Sony ZV-E10 camera body a 24 mp crop sensor camera and use a 16-50mm lens f3.5-5.6 PZ this made a perfect pocket sized mini kit. Not sure it will make for perfect critter capturing, but we’ll see.. keep reading 😉
Sony ZV-E10 camera body
So with the kit set I headed out for a short stroll to the local nature reserve. It’s about a five minute walk from my house so perfect local location.
It’s not a big place in fact the part I headed to you can walk around it in about ten minutes there’s a bigger part you can walk that would take about an hour round trip but as I say I just wanted to head out for a short stroll.
With the mixed weather we’ve been getting the last few weeks the vegetation and plant life doesn’t know if it’s coming, going, been or gone.. so I thought this could be a wasted journey but I was pleasantly surprised.
I walked through the metal gate to be greeted by long grass and lots of colourful, dare I say flowers.. vegetation and a lot of buzzing sounds. Could I be lucky and capture some bees about their business.
Well I took the camera out and just as I did a buff-tailed bumblebee buzzed past me and landed about five feet from me on a beautiful magenta plant – could I get an image in the bag this quick.. so I set the camera to 50mm (75mm as crop sensor) f9 1000/s and because of the f9 had to use a 1000 iso .. and took a chance I got down low and took the shot..
Looking at the back of the camera I was surprised, I had captured a very clean and pretty decent looking shot. Here’s that picture !
TheBuff-Tailed Bumblebee
Don’t think it was too bad for the first shot of the day.. and as he took off right after I clicked the shutter leaving me with only a single shot . Some might say a fleeting moment captured…
Now to get up and look for more. When you enter the “nature reserve” you have about ten feet of entrance and then you’re greeted by a hedge with two openings kind of an in and out so to speak.
The hedge blocks your view of the rest of the small reserve. Annoyingly, the last time I was there the grass had been cut and there wasn’t much in the way of a meadow, but as I rounded the dividing shrubbery I was greeted with a meadow of greens, yellows and magenta blooms, a number of butterflies and because of the medium sized pond that’s engulfed in reeds and long grass there were a few breeds of dragonfly fleeting about. There were also a lot of honey bees and even more buff-tailed bumblebees .
Tree Meadow
The Reed Pond
If I’m honest this type of photography doesn’t come easy for me. I don’t have the steadiest of hands at the best of times hence why my settings are high when it comes to shutter speed. That and with the speed some of these critters move I thought it would be best to shoot fast.
Let’s get back to walking around the nature reserve. So, where was I?
Having been happy to see that there was life and a flowering meadows I started walking and looking for more opportunities which thankfully didn’t take too long before something caught my eye. Something I haven’t seen much of on my travels the last few years.
Numbers of butterflies locally have been pretty low.
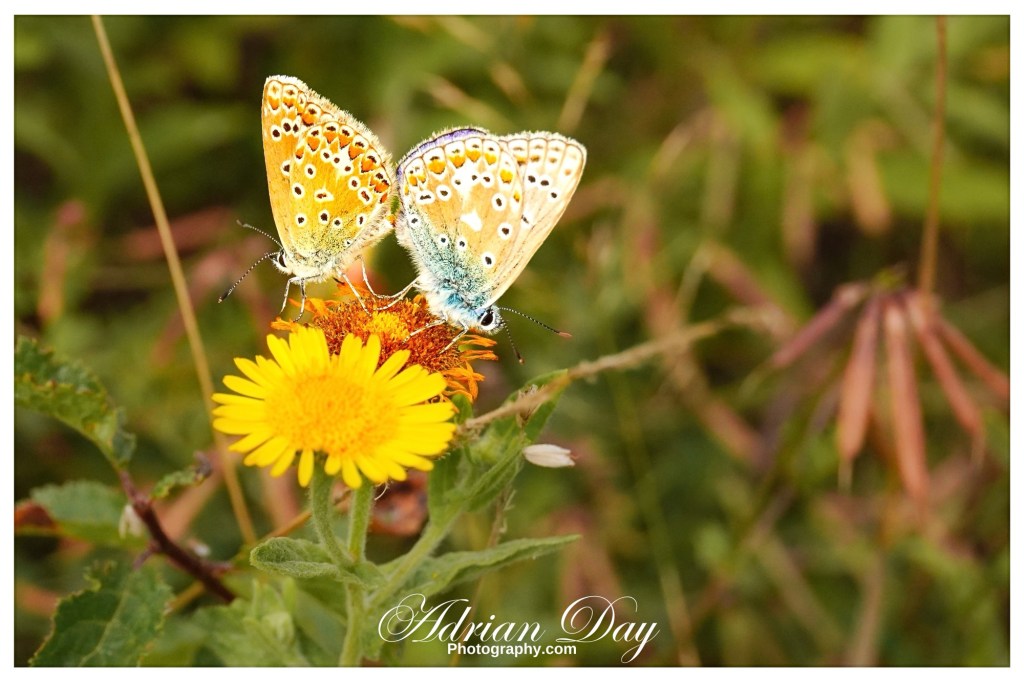
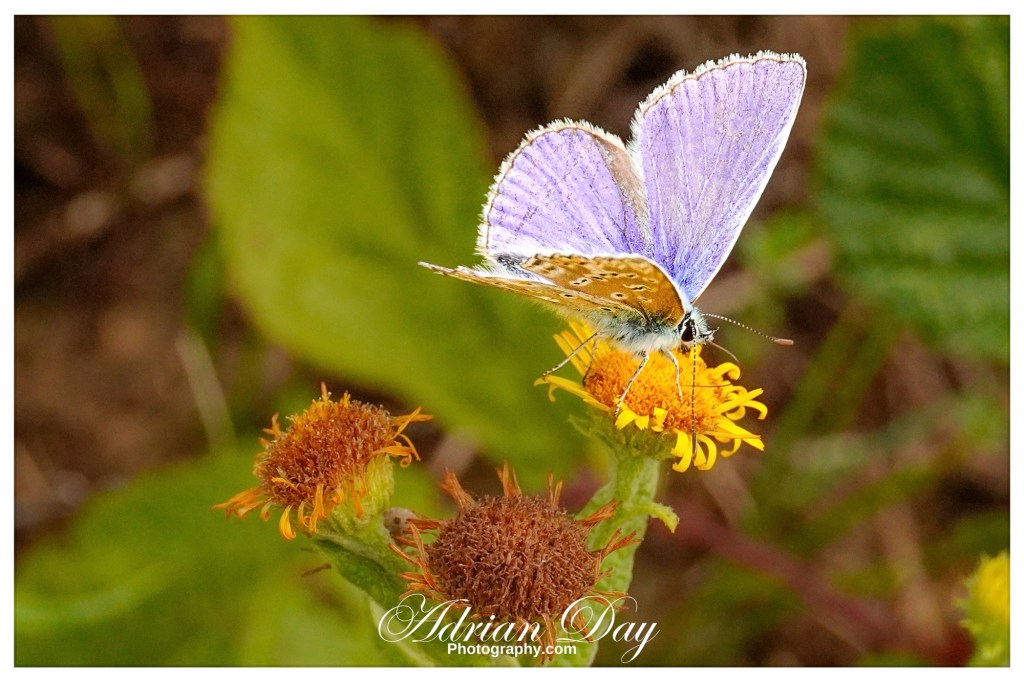
This butterfly was eye catching in fact it wasn’t alone, this picture will definitely tell a thousand words and don’t think I need to say more about what they were getting up to.
I’m sure that you will agree these common blues have a beautiful pattern really something eye catching.
Common BlueCommon Blue
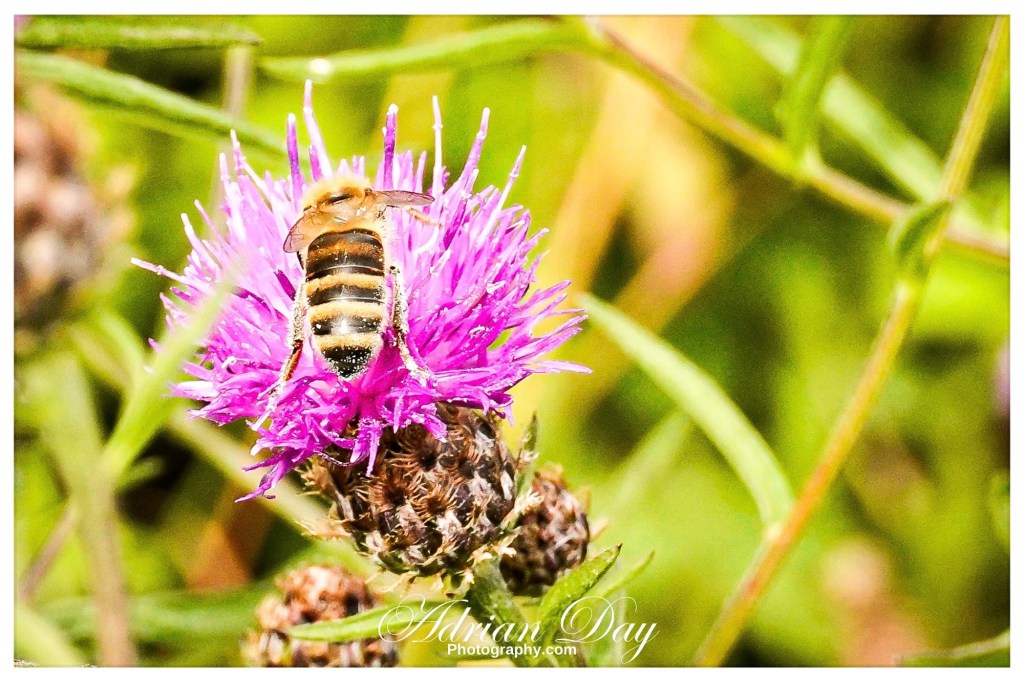
While I was praying to the camera gods ( down on my knees ) I noticed there was a honeybee just to the left of me. Only it was not staying in one place for long, so knew this could be like my first image a fleeting shot if I even manage to get it..
I had to change the settings because of the light kept changing. So these two although both different brightnesses were shot using 1/800s still at f9
Western HoneybeeWestern honeybee
There must be something about these magenta flowers if you know what these might be leave me a comment, I can’t seem to find what they are.
Next stop for me was waterside, I wanted to see if I could capture a picture of a dragonfly of some sort, and add to the days captures.
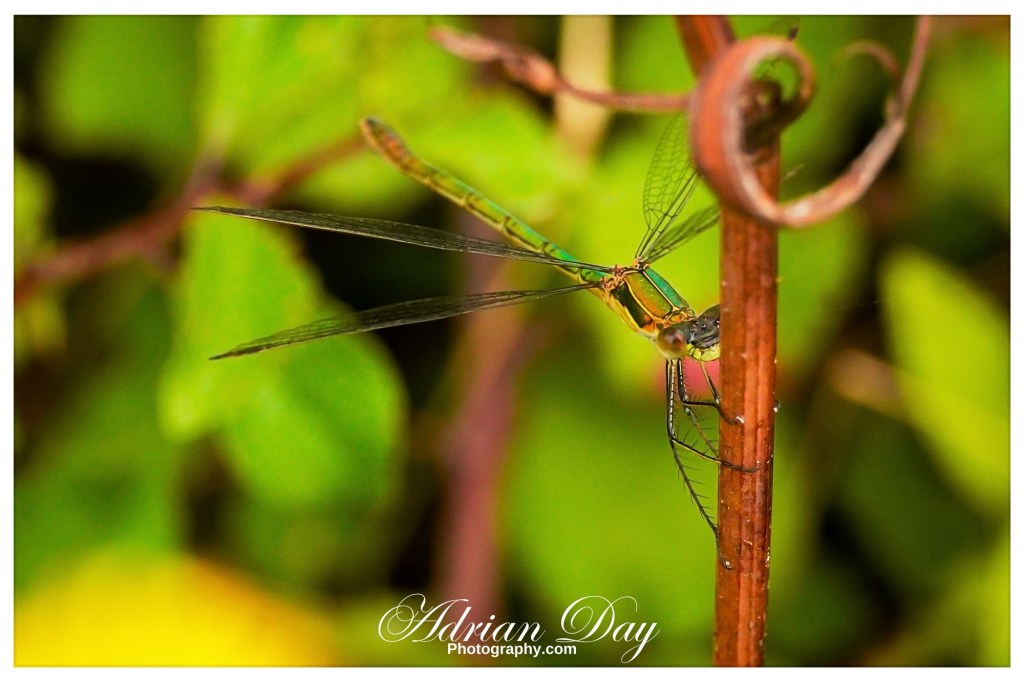
It took a little while of sitting by the water – probably about fifteen minutes or so when a small emerald damselfly (believe that’s what it’s called) started playing about over the water so maybe my luck was in.. but no such luck, it soon took off never to be seen again..
So there I sat for a while thinking this will be a bust not going to get one and then I see one ..literally two feet from me blending in behind a red twig .. a two inch long metallic emerald green dragonfly. It must have been there all along – now if I move am I going to make it fly away?
I twist moving the camera very slowly, I’m sure it sees me because it moves around the back of the twig (the little bugger is playing hide and seek) so the next shot, you will see what I mean – it’s like it’s watching me.
Emerald damselfly
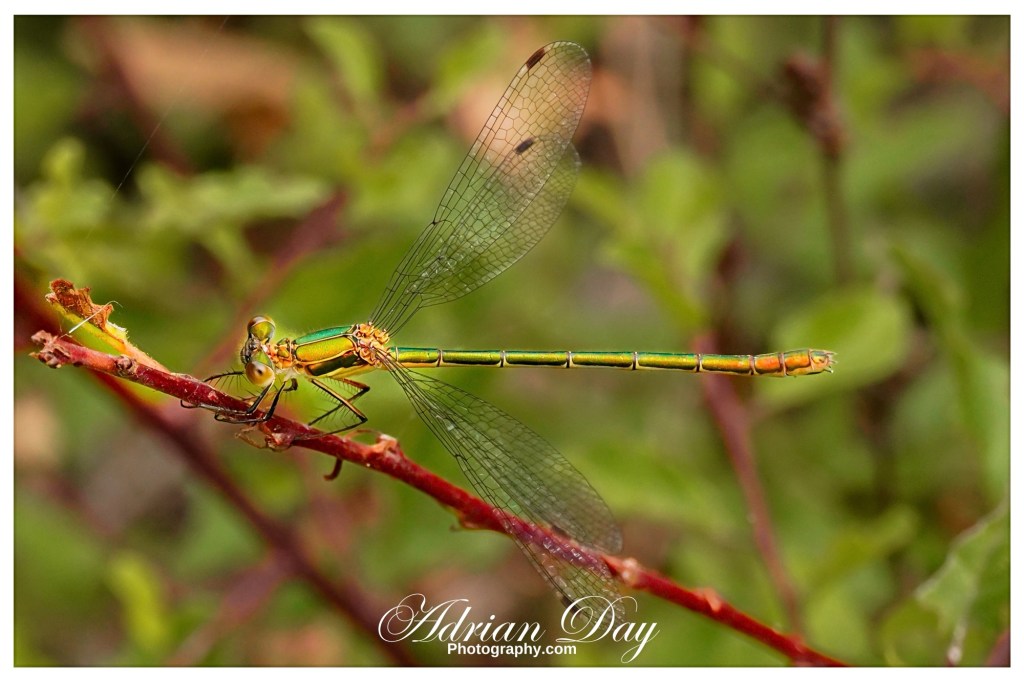
Now to play games with it, I want to get a better shot of it.. really isn’t easy because of its location and flowers in the way.. time to move a little round the side and get a side view.. this shot is what I managed to take by holding the camera out to one side and keeping my butt fully planted so not to make the grass or twigs move..
Zoom in and let me know what you think!
Emerald Damselfly
I’m pretty happy with it as it shows lots of detail and those colours are like multi coloured tinfoil. At least I managed to capture a picture of a dragon fly ..
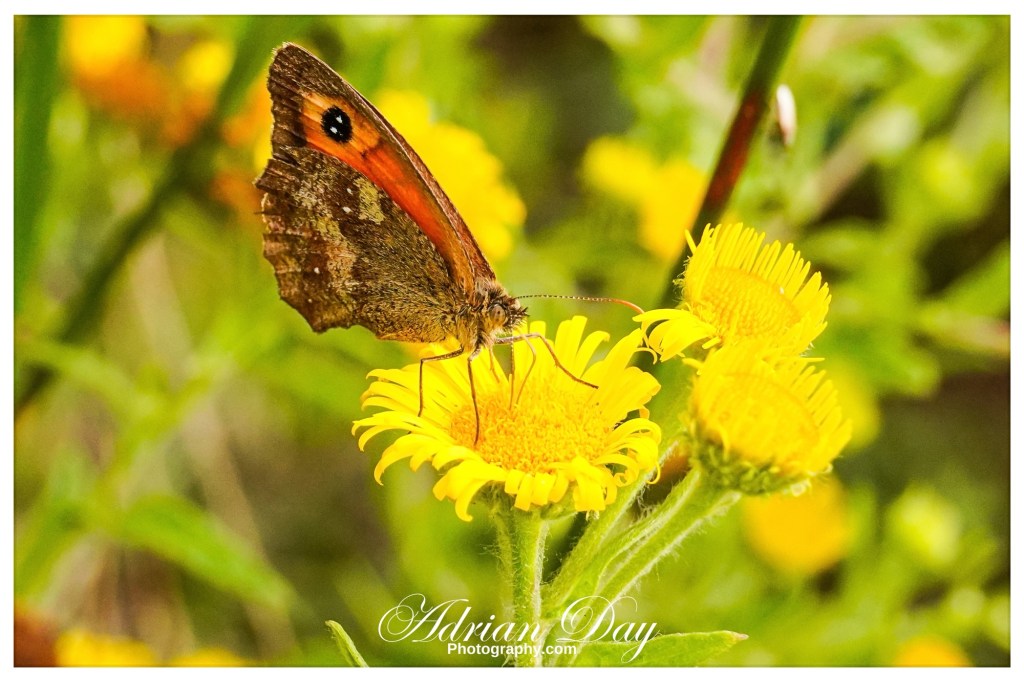
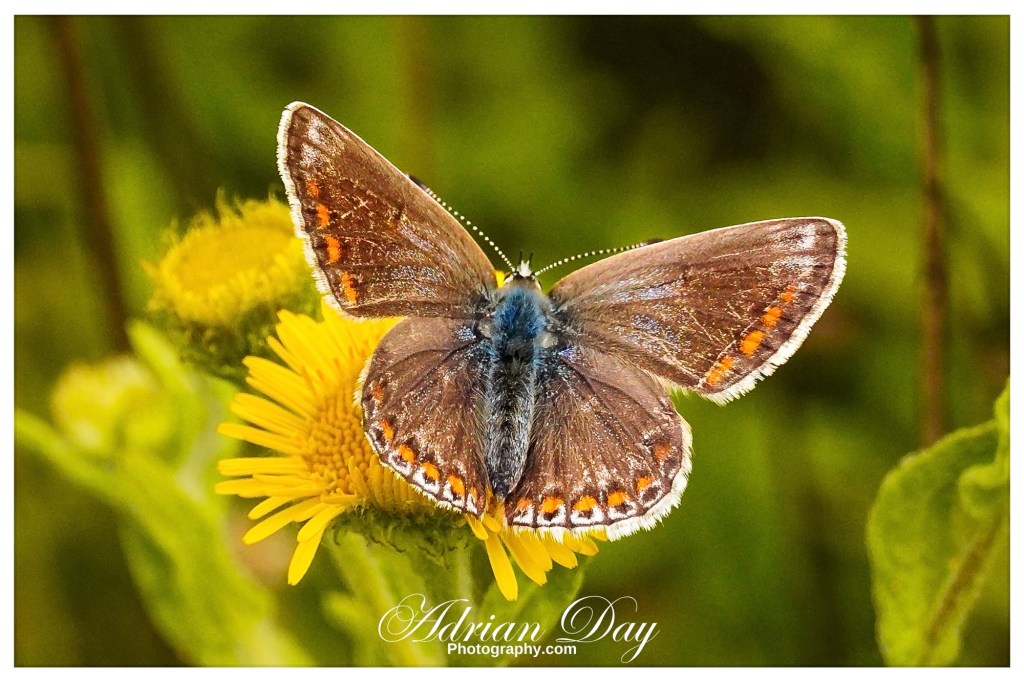
I won’t hold you too much longer! On my walk away from taking the last few shots I managed to capture a few other beautiful butterfly images so will finish with a few of them.. there was so many on the other side of the tree (pictured previously )
What do you think of these.. these are a few I’m definitely proud of.. again beautiful detail and who knew that there would be so many types in one place.
Common BlueCommon BlueHedge BrownCommon BlueHousefly & ladybug Housefly
And lastly
Hoverfly
My conclusion even though having a macro lens and a full frame camera and so on will always take things to the next level.
I feel sometimes you don’t always need these things to still get creative and get up close and personal with a subject..
Even with some of the cameras from two or three years ago you can still get some cracking shots, let me know what you think,do you agree?
Do you like what I captured?
I’m no macro photographer and I’ve only done this sort of thing a handful of times.. but I’m sure you will agree theres something about each of these images that makes them stand out !
Until next time! Thanks for reading, now stop wasting time and go take some pictures 😉 😉 😉
Been working on a few projects over the holiday season! And also been given a little time to think about is there something that I can give my followers as a thank you for all their kind support.
So I come up with a few ideas one of which has gone live on my ko-fi page..
I have created a kind of cinematic landscape photography cheat sheet. It’s free or if you like to it give the option of leaving a donation of you choosing. But it is free if you want it for free. You just have to leave a few details and click download. Details are just so that I know people are downloading. You won’t be pestered by 101 emails from me.
The sheet is printable please don’t print to give away just send anyone you think would be interested this page link and tell them to download it.
It helps me know I’m helping others and also lets me know if I doing something right 😉
So without further ado! Here is the link!
Click this image to be taken to our ko-fi download page.
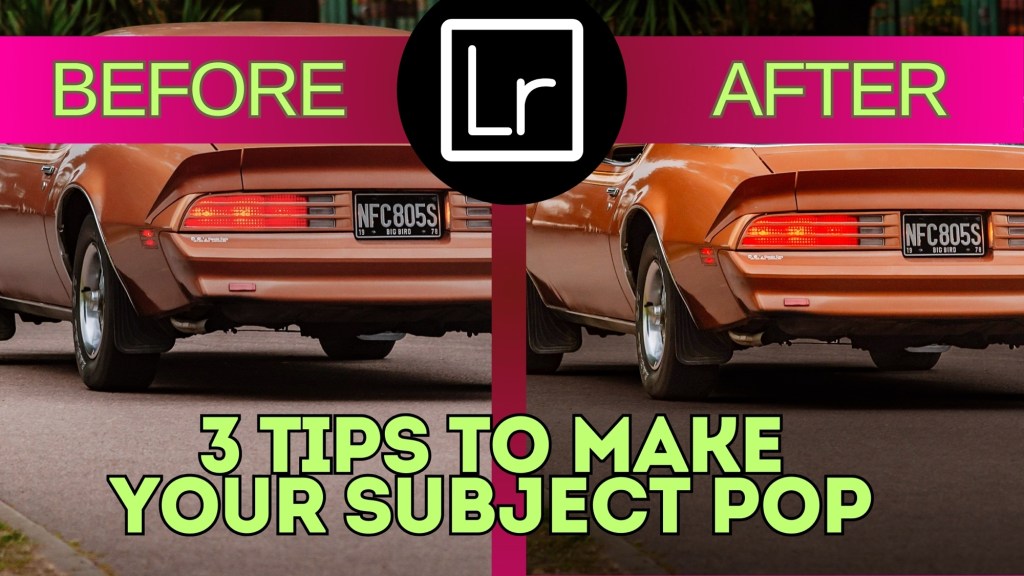
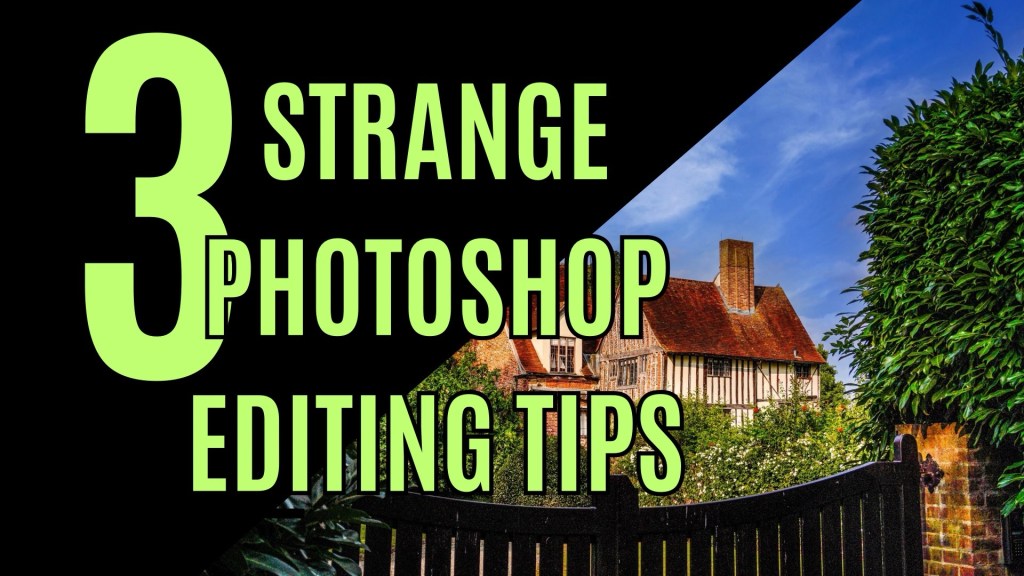
This video is a short three minute video showing three ways you can make your subject stand out in lightroom.
These simple editing tips will quickly have you editing in a new way and is so simple it takes just seconds to create .. and get great results!
So
What do you have to lose. Click the image below to get taken to our YouTube channel to see this cool and interesting way of making your subject stand out!
Hope to see you there! If you like it please give us a subscribe and maybe if you have time a like and comment 🙂 we love a good chat !
Okay I will stop now check it out in the link below 🙂 have a great day !
Hey guys and girls another short and simple post just to let my followers know that there is a new video live on my YouTube channel .. just lick on the link /image below to go see it ..
Trust me if you’re a new photographer you’re not going to want to miss this trick!
Hey guys and girls short post tonight asking for your support and kindness over on my new tiktok page!
Would really appreciate it if you have tiktok that you pop over and show some support. By watching sharing liking my new video.. linked below (click the image)
This is a high quality image download that will print to 60x40cm with a high quality finish. When printed professionally at a printing company.
The image looks amazing on walls in bedrooms , offices, lounges and more and are perfect if you own a hotel or restaurant.
When purchasing this digital download you get the rights to create upto and no more than three copies. For personal use. Or to give to someone else. Where no monetary benefit or transaction are made.
PRICED AT £10.99 AND DOWNLOADED FROM OUR SECURE PAYMENT SITE AT KO-FI @ THE LINK BELOW.
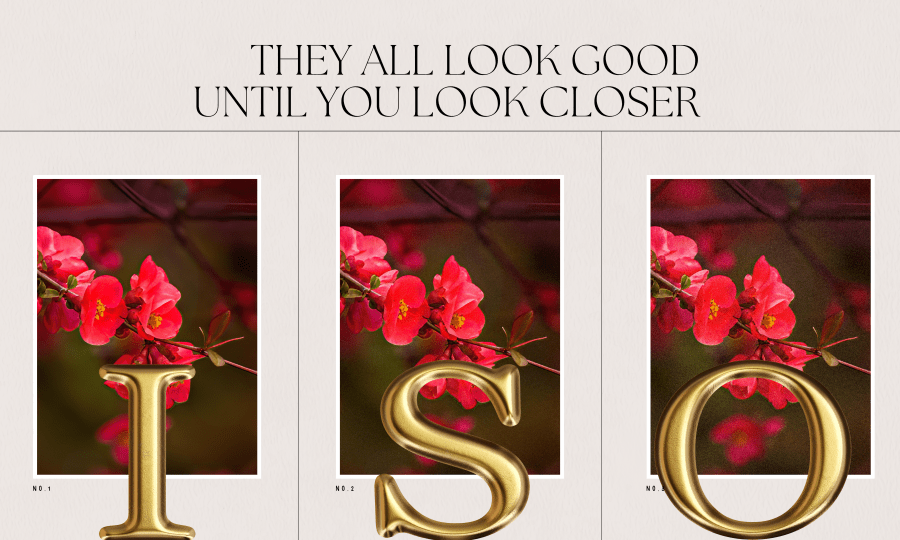
Photography is an art form that has evolved over time with the advancement of technology. One of the essential aspects of photography is ISO, which determines the sensitivity of the camera’s sensor to light. ISO stands for International Organization for Standardization, which sets the standard for sensitivity ratings in photography.
In this short post we will discuss what ISO is and how it works and categorize it into three categories: basic, in-depth, and advanced understanding.
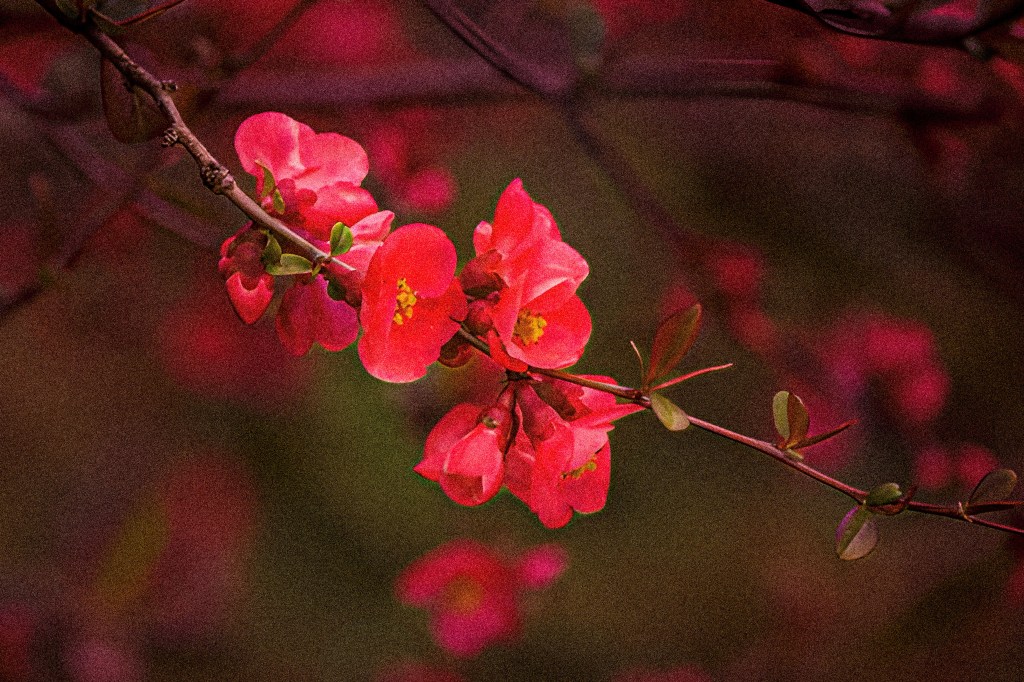
Firstly three images .. starting from 100 in picture one 3200 in picture 2 and 6400 in picture three. to see the way images have less detail and also more noise the higher the ISO
Image 1 shot at ISO 100 – Nikon 7200Image 2 shot at ISO 3200 – Nikon 7200Image 3 shot at ISO 6400 Nikon 7200
Basic understanding of ISO:
ISO is a measure of the camera’s sensitivity to light. The lower the ISO number, the less sensitive the camera is to light, and the higher the number, the more sensitive it is. In simple terms, ISO determines how bright or dark an image will appear. For instance, a low ISO number of 100 will produce a darker image, while a higher ISO number of 800 will produce a brighter image.
In-depth understanding of ISO:
ISO is one of the three essential elements of exposure, along with aperture and shutter speed. Aperture refers to the size of the opening in the lens that allows light to enter, while shutter speed is the duration of time the shutter remains open. ISO plays a vital role in exposure because it allows the photographer to adjust the camera’s sensitivity to light to achieve the desired exposure.
A low ISO setting is ideal for shooting in bright conditions, such as outdoors on a sunny day. On the other hand, a high ISO setting is suitable for shooting in low light conditions, such as indoors or at night. However, a high ISO setting can introduce digital noise or graininess to an image, which can result in a loss of detail and clarity. It’s essential to strike a balance between the ISO setting, aperture, and shutter speed to achieve the best exposure and image quality.
Advanced understanding of ISO:
In addition to its role in exposure, ISO can also affect the overall mood and style of an image. A low ISO setting can produce a sharper and cleaner image with less noise, while a high ISO setting can create a grainy or gritty look, which can be desirable in certain types of photography, such as street or documentary photography.
Another advanced technique is ISO bracketing, which involves taking multiple shots of the same scene with different ISO settings. This technique is useful for capturing images in unpredictable lighting conditions, such as during a sunset or sunrise, where the light changes quickly. By taking multiple shots at different ISO settings, the photographer can choose the best exposure and eliminate any unwanted noise or graininess.
In conclusion, ISO is an essential aspect of photography that determines the camera’s sensitivity to light. It plays a vital role in exposure, image quality, and overall style and mood of an image. Understanding the basic, in-depth, and advanced aspects of ISO can help photographers make informed decisions when setting up their camera and capturing their vision.
This is part of basic learning with photography. There are more technical details to iso but I don’t want these posts to resemble a ikea instruction manual lol! And more make it a simple understandable read.
This weeks ‘More Info Monday‘ is about the shot I took last week (Friday 15th October) free reference card download with this post
Back story!
While I was taking a well earned break from writing new scripts for the New YouTube Channel
I was sitting in the bay window, Drinking a very hot coffee and munching on custard creams ! While watching the better half outside filling up the bird feeder .. on her new bird table,
Now if you’re a photographer like me this sparked the mind into capture mode. See I’ve taken a few weeks away from people photography.. ! So I’m missing the thrill of the shutter .. I thought ‘Let’s try and capture a starling’
Now you’re probably like most people and asking why a starling! There’s so many other birds like robins and blue tits ..
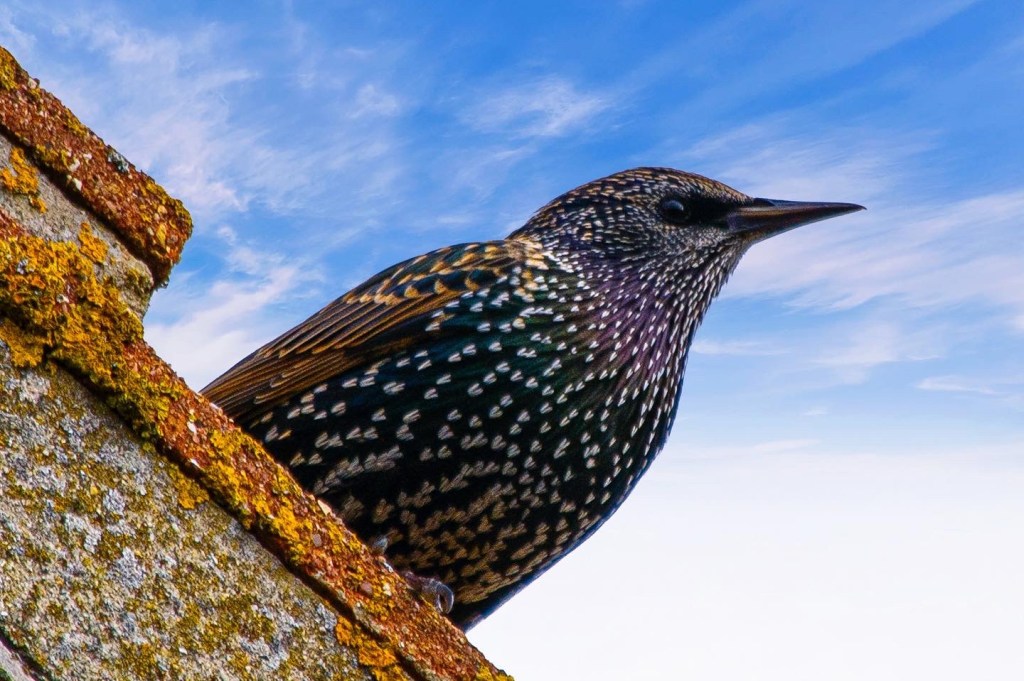
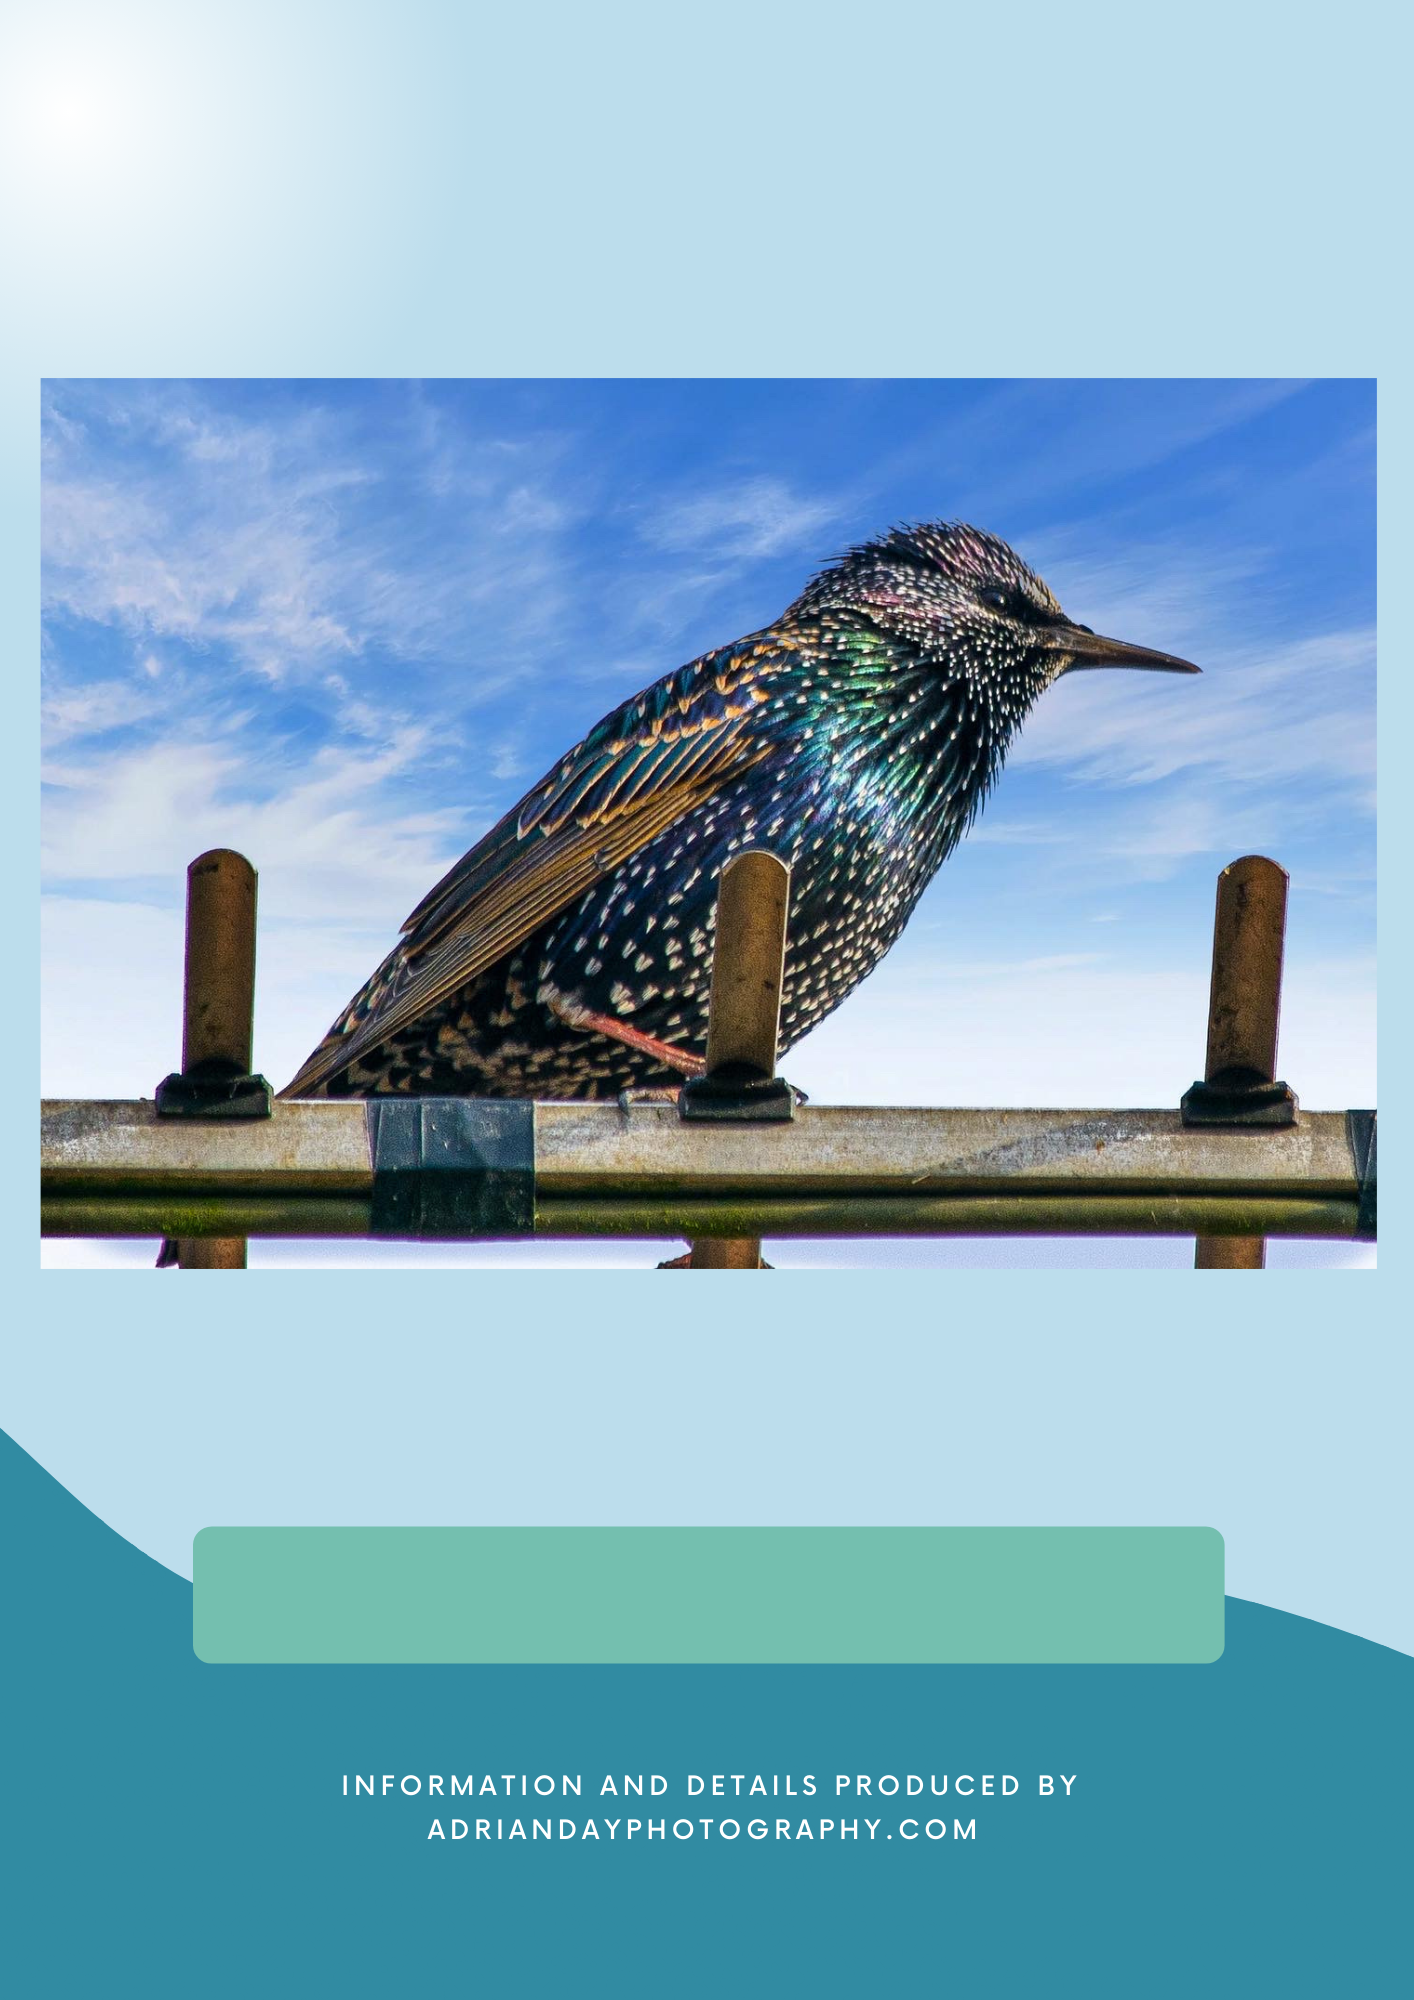
Well I love looking at starlings, there’s something about their plumage this time of year thats just beautiful! Now when I post the images below I hope that you will see what I’m getting at! . Also to me everyone seems to neglect the starling family and always head right for the money shot with a robin .. it’s too normal for me 😉
Main story
So I headed to the camera bag unzipped it and took out the camera of choice the Nikon D7200.
Again I bet there’s a question 🙋♂️ why the D7200 and not your Sony gear! The answer is simple .. the Nikon D7200 is a 24 mp Crop sensor not a full frame 24pm like the Sony bodies I have .. see the way I see it is I’m pretty close to the bird table and with the crop multiplying the lens choice by 1.5 ish this will give me a nice close up shot. while still being in a warm house with my coffee ! (Can’t forget the Coffee! )
Now lens choice was questioned as I do have a bunch of lenses for the Nikon one being the sigma contemporary 150-600mm but being close to the table I thought better of it and decided let’s use the 55-300mm Nikon lens, remember this on the D7200 is equivalent to 83 – 450mm due to the crop!
Perfect ! All set..
.. so once the good lady come back into the house I perched myself by the window (pardon the pun ‘perched’ ) did I mention that’s where the coffee was 😉 I opened the window and waited !
And waited …..
I could see and hear the birds but they wasn’t coming to the feeder because I was to close .. I could see them on the roof opposite my upstairs window ! New plan leave the comfort of the bay window and head for the bedroom window ..
New plan of action.
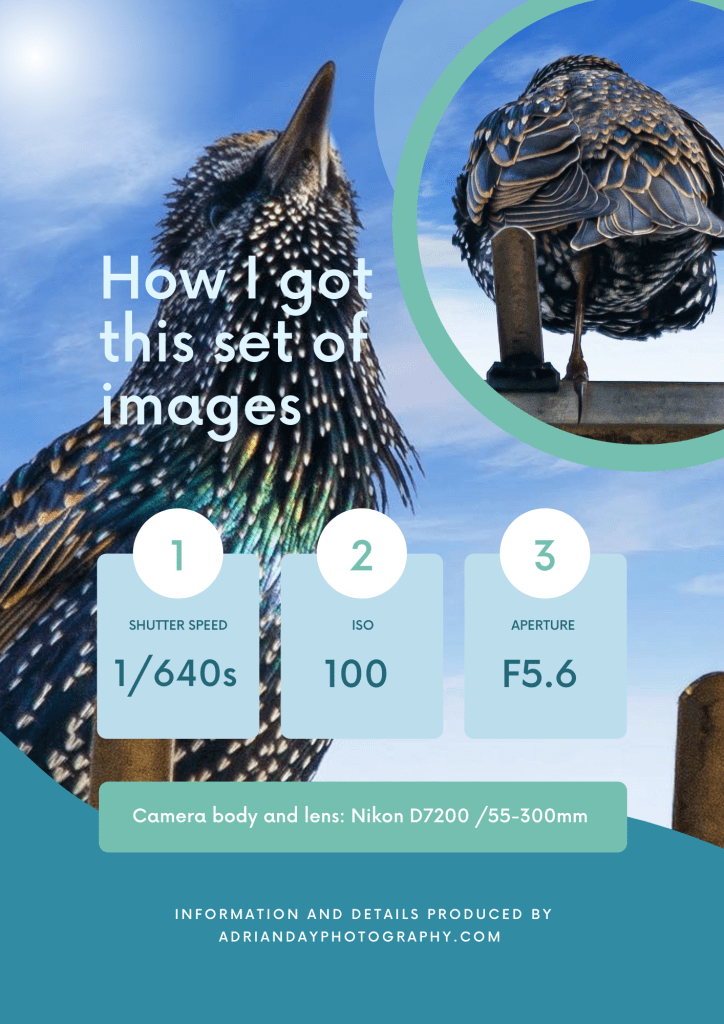
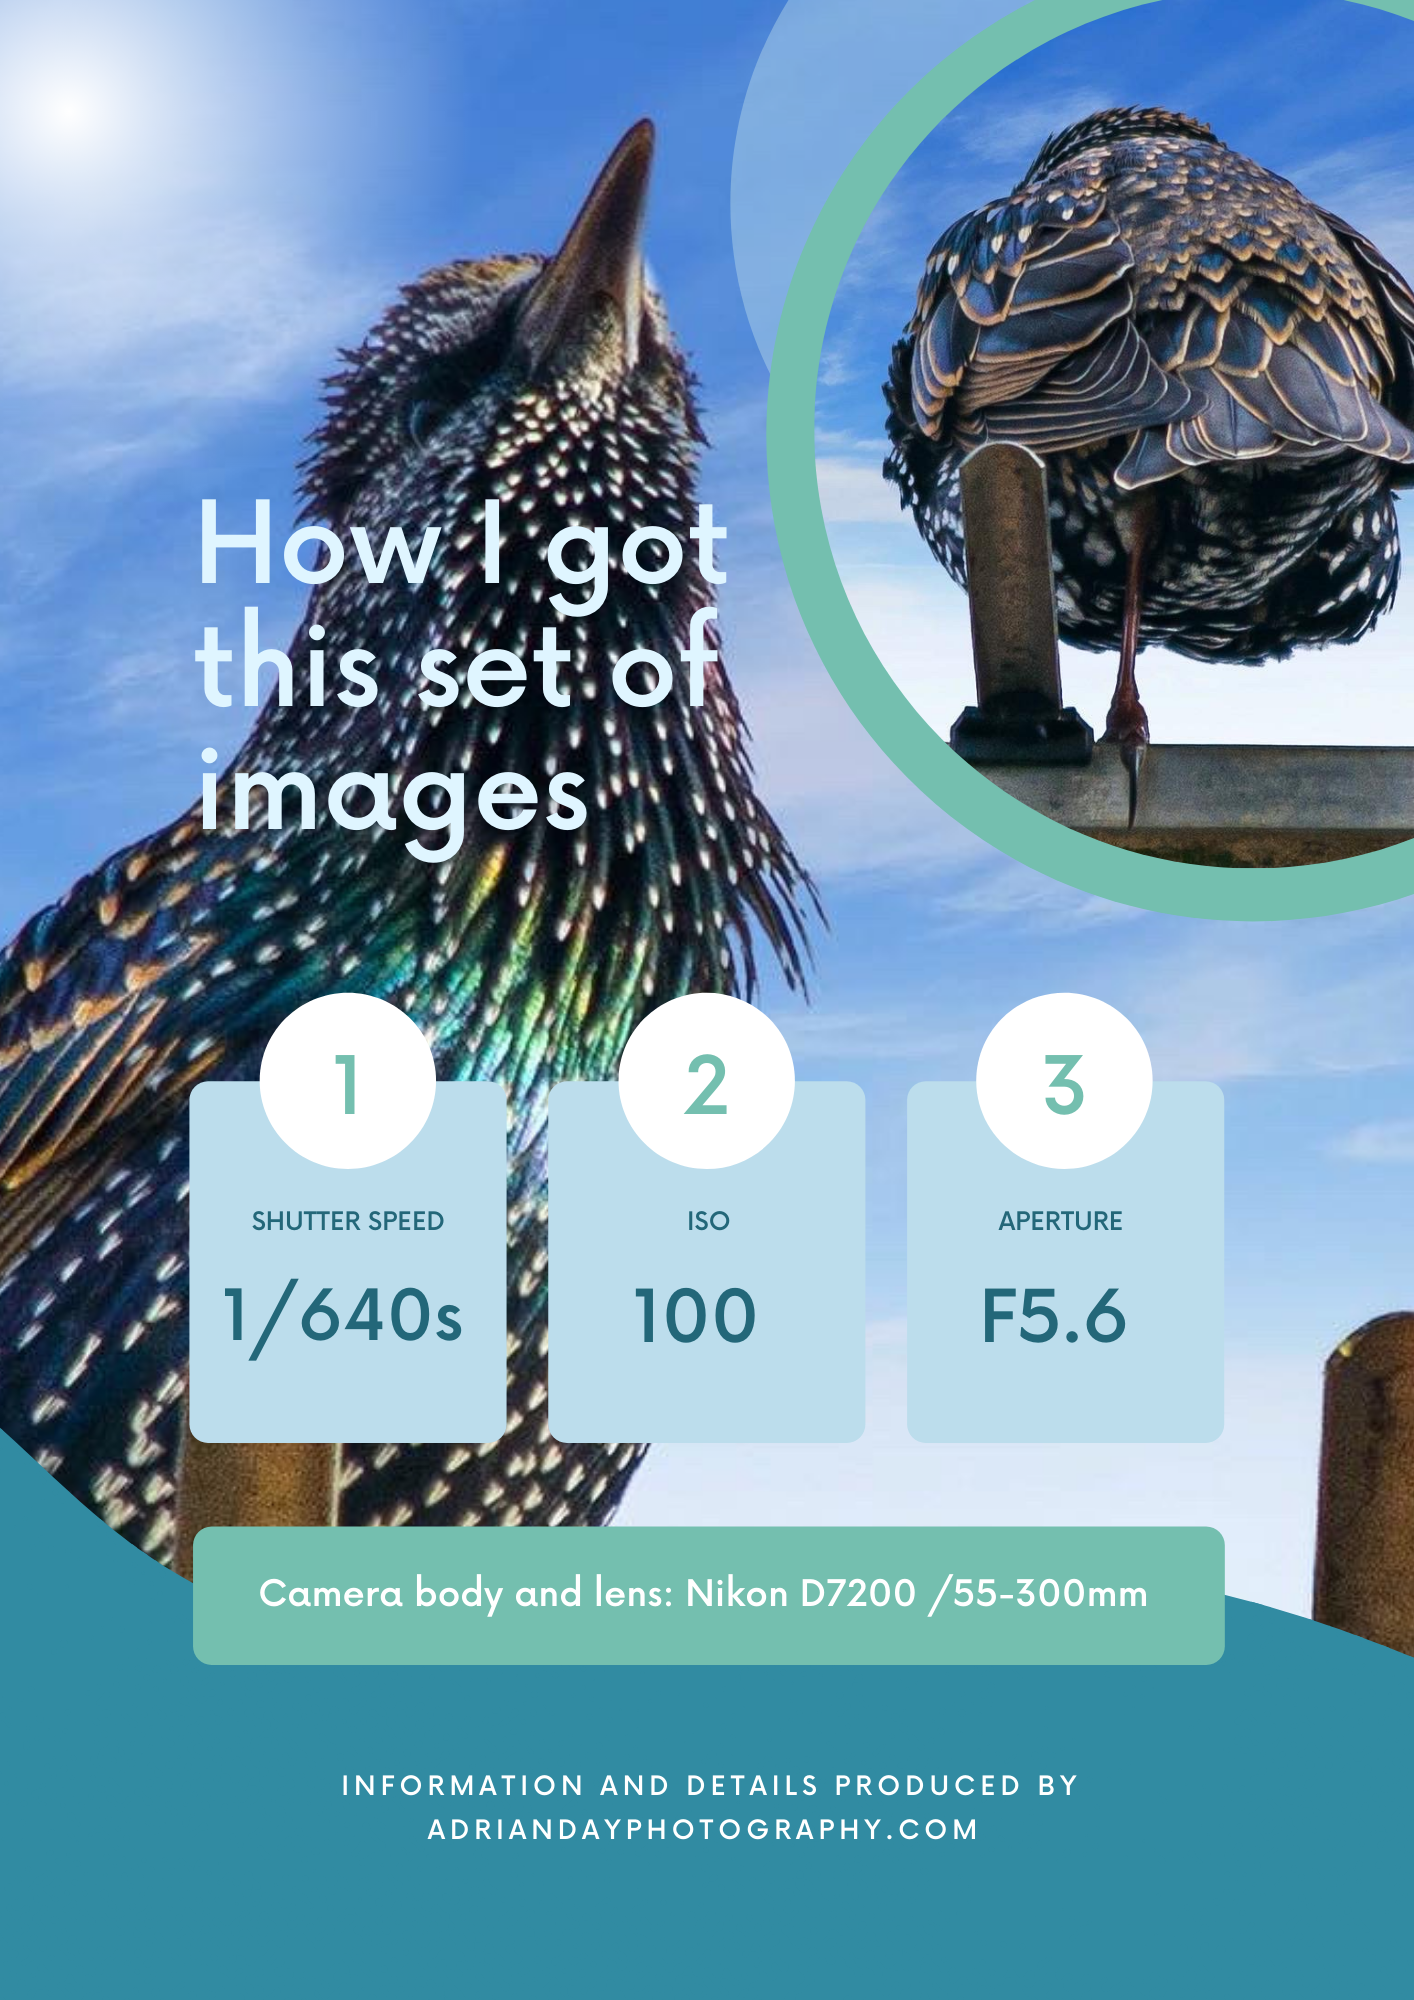
See when I was in the bay window there was a close wall as a backdrop the setting I would have used would have been pretty simple .. ISO 100 f6.3 and at least 1/250 as these bird would be standing pretty still .. and maybe I could get some wing movements .
Now I’m up in the bedroom I have a different backdrop .. the birds are on the roof and tv aerial so I have sky to deal with .. I want detail in the blue sky.. so I need to find a good balance between bird detail and sky brightness. First test shot I started with was iso ..
ISO. Native 100 to get the best for low noise .. I wanted a lot of light coming in so the widest aperture of the lens F 5.6 was best I could do.
Now this time the birds are moving a lot so needed a faster shutter speed and there was clouds so didn’t want to blow them out wanted some detail. So shutter speed 1/1000 I snapped a few shots and no detail in the birds and dark sky
I forgot to mention this is 5:30 ish pm evening setting in .. but still some sun behind the clouds . Giving lovely soft but bright light ..
A few winds later the shutter speed was set to 1/640s looked out the window and realised every starling was gone!
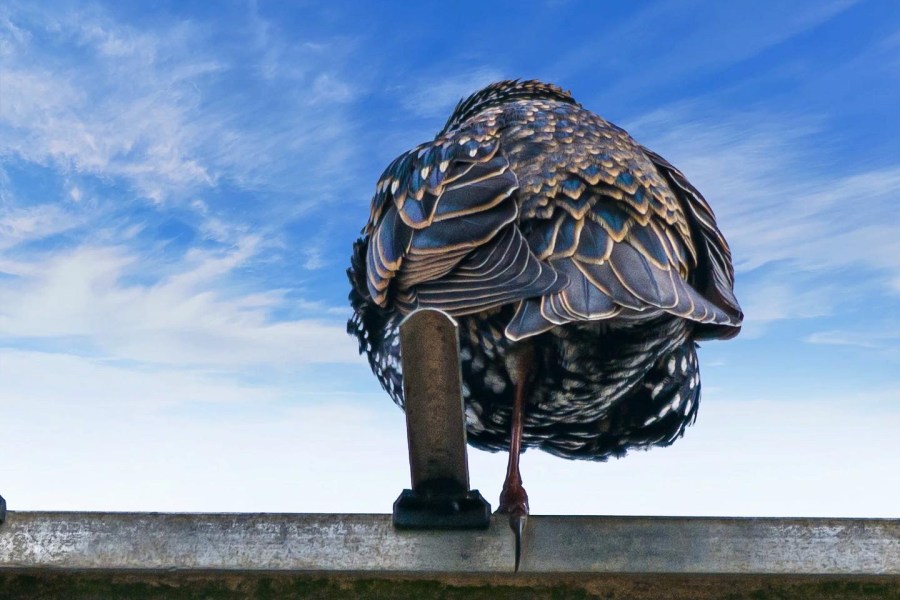
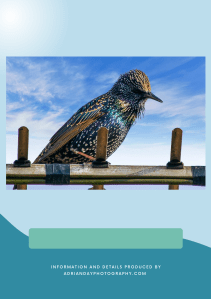
All but one ! The one you will see pictures shortly! He / she was stunning ! Beautiful colours .. deep black tone and speckles on it’s under belly.. I couldnt ask for a better looking starling .. though it was perched on the tv aerial it did look great with cloud and blue back drop.. but the distance was about 5 metres away could be a little far for perfect detail knowing this lens .
I pointed my camera at the sky a quick test shot and sky perfect lots of detail and perfect white clouds
Now’s my chance bird still alone .. I pointed the camera at the starling zoomed the lens to best fill the frame … focused and started reeling off shot ! About twenty total .. now I’ve worked with models but this bird was such a poser ! 😉 head up head down tilt to the side even a one leg pose !
I got a little carried away and,
Forgetting I didn’t take into account the bird deep tones before reeling off the shots I quickly pressed the review button and to my surprise pretty much perfect ! Just a tad under exposed on the bird but lovely detail, lovely tones and nothing a little post production couldn’t fix !
So in post all these images had done to them was. Simple adjustments in lightroom .. my normal
Shadow lifted , highlights dropped, detail clarity vibrance +10 and a little tone curve adjustment ..
Now this is the finished product .. well five images .. I’ve also done a card with shot details on that if you’re on a phone you can screenshot so that you have it so that you can try the settings to capture a few starling shots of your own..
If you do please tag me in the images on Instagram be great to see what you managed to get and how you got on..
Also if you liked this post and want to see /read more of how I got the shot.. settings so on.. please follow the blog I would love to have you along on my journey.. and more will be coming in the future like presets and review /news
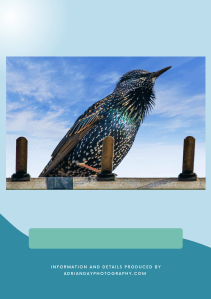
Okay here’s the pictures and under that the card download file for reference.. let me know what you think !


